This Model Railway depicts BHP Billiton's long iron ore railway from Port Hedland to Newman.

Monday 28 May 2012

The Lay of the Land

This is the map of Newman - quite a modern town
The Great Northern Highway (in A4) leads to Port Hedland, where the sea is, and the destination for the iron ore. 
The road in C1 leads to the iron ore mine, and you could also see in that square the Radio Hill lookout.
Also on this map you can see a tiny built of the railway (in A1), leading southwest to the mine, and northeast towards Port Hedland.
As you can see, Newman has its own Golf course!

Newspaper and foam are stronger than you think...

The plan of my town (Newman) has developed significantly, and i would show you what it looked like, but i have the habit of making many changes to my plans...
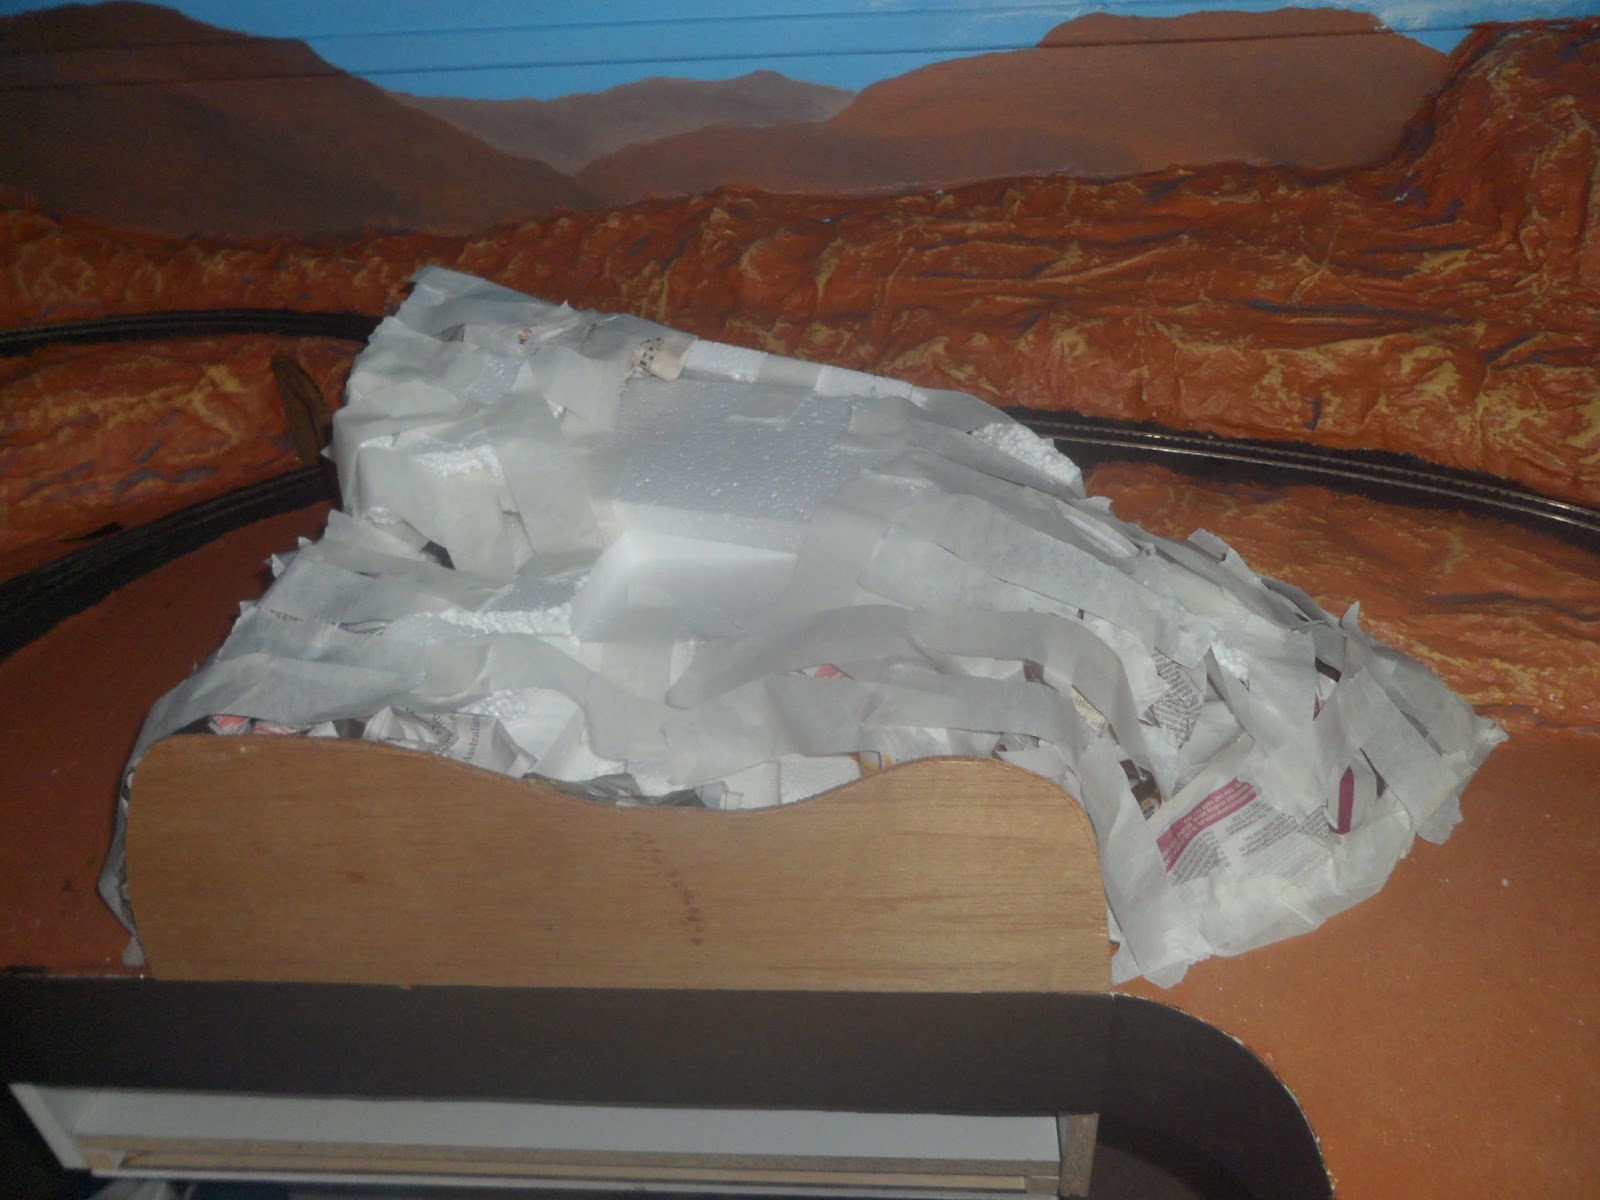
But what have been doing is building a mountain as a separation between the scenic part of my layout and the town, to represent a long distant, or at least a separate area.
This involved a newspaper and foam build...

The shape of the mountain (sorry about the blurry mark in the middle, i think my camera accidently got wet and got some water in it):

 The cliff side:

Now the extended fascia:

A bit of mountain shaping took place to adjust to the fascia:

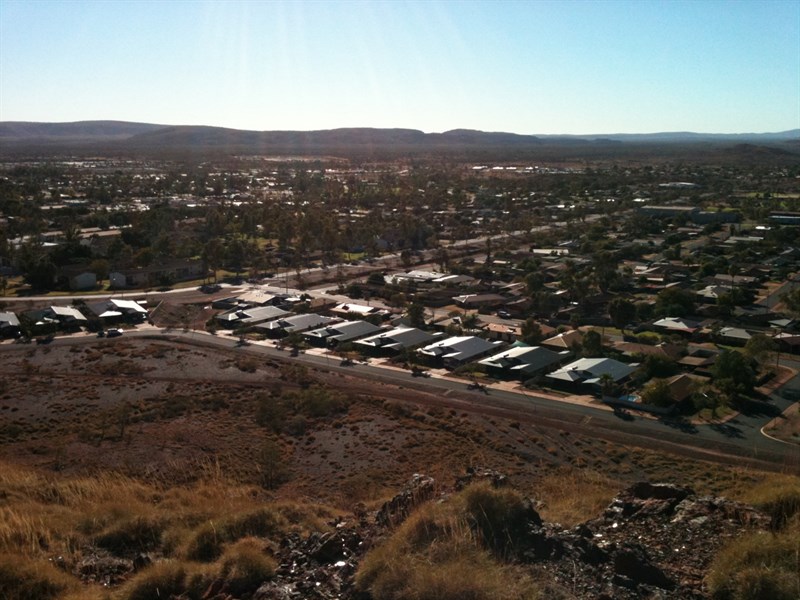
I decided that while i was adding mountains, i would also add the road that leads from my town to the radio hill lookout, that looks over Newman. Here is a picture of the view that you can see from the lookout:

Only problem is...i can't find any images whatsoever of the actual tower, so that i can model it, or even have an idea of how big it is. But in the meantime, i built the road leading up to it:


Although from the pictures it appears to be a whole lot of white tape, what i did was:
- measured and cut sections of flat foam at the right width and length.
- cut away part of the pre-existing mountain and fit the pieces in place to see how it looked.
- when happy with the locations and lengths of the pieces, they were glued and pinned in place.
- this is when the masking tape was applied to hold the pieces and cover gaps.
- newspaper was scrunched up and added to make the roads look like they were in natural locations, not just shoved into the side of the mountains.
- more masking tape and...its ready for plaster!

Thursday 17 May 2012

Cross Beams on the little wooden shed

I have been spending my time wondering how is the best way to have a removable roof on this wooden shed. I want it to be removable so that it will be much easy to insert inner details and (maybe) lighting. The cross beams and walls on each end would not be removable, but the ones in the middle would be. So to make the main house's structure nearly complete, i added these:


It looks like a house!

Next is the removable roof, and maybe the walls...

Hide-away desk

No - i have not been working on the mountains like i should be (i need to make plaster rocks to cover the mountains) but instead have added a useful sliding away desk, to help me have an extra workbench.
Here it is:

With stuff on it:

Hidden away!

It is measured at the same height as normal desks, so i can use it for drawing plans and writing on without having to reach up too high:

A look at the very simple insides. Instead of using another long strip of wood on top of the sliding draw to hold it down, i used simple square metal to support it:

 It works well but it needs painting in order to blend in with the black fascia.